Posting holiday photos to a large audience is so easy on social media that the number of people buying postcards has slumped. Caardvark, however, combines the old-style charm of a card dropping through the door with the hi-tech convenience of your smartphone, allowing you to send postcards using your own photos to your loved ones from right inside Facebook’s Messenger – quick, easy, and no scrabbling for stamps and postboxes.
I started building Caardvark over a weekend with a good friend, Harald Carlens, getting to grips with the Microsoft Bot Framework and the world of chat bots. When we managed to send our first postcard that weekend, I decided to pursue Caardvark as a great opportunity to learn some new technology and see where it led!
The idea behind Caardvark came from our own experiences sending postcards on holiday. With the ease and instant gratification of posting holiday snaps to social media it’s not hard to see why sending postcards has declined 75% over the last 25 years. Finding a suitably cheesy card, a stamp and a postbox can often prove difficult, all for your card to turn up weeks or 79 years later! However there’s just something about receiving postcards that makes them special and a generation is missing out.
While services like TouchNote and MyPostcard have gained popularity with their apps for sending postcards, limited annual holiday time and the difficulty/expense of getting people to download apps has meant they still remain very much a niche. Harald and I felt that a chatbot would be a great medium for this, being accessible from an app many users would have on their phone already, involve familiar interfaces and interactions for the user and avoid the hassle of having to sign up for an account. We’ve subsequently found we weren’t the only ones to have this idea, but there’s always room for someone to do something different – and maybe better.
Tools and Services
One of the key factors in making this idea feasible, and without which it might have remained on paper, was discovering Lob.com. Lob, a Y-Combinator funded company, allows developers to send post programmatically. With a simple API call you can send cheques, letters and, of course, postcards. Without a subscription the cost per card is more expensive ($0.79 with $0.90 international shipping), but perfect for a hack weekend and developers playing around with ideas.
Of the consumer chat services Harald and I both used, WhatsApp and Messenger, only the latter offers a chat API, which made it easy to choose which platform to build for first. Although you can interact with the Messenger API directly, we chose to use Microsoft’s Bot Framework, which acts as an abstraction layer between your app and Messenger, or chat services such as Telegram, Skype and WeChat, which it also supports. Using something like this greatly reduces the time it takes to develop a bot as it keeps track of a user’s progress in a conversation and retrieves any attachments, such as images, a user sends with a message. Developers can use the Bot Builder SDK, which supports C# and Node.js, to interact with the Bot Framework – we chose C# as much of the code I had from previous projects to process images and interact with Azure Storage was in C#. Although a lot of the hype around conversational interfaces and chatbots has subsided, this hasn’t deterred Microsoft from continuing to develop their SDK and include some impressively rich features, such as natural language analysis and the ability for your bot to learn from conversations.
Making it possible for people to pay us for their postcards was also an important part of the build. For this we had two candidate services, Stripe or PayPal, as although Facebook Messenger has a built-in payment capability this is only available to US users. Stripe was our preferred choice with its excellent documentation and ease of use, but our plan was to sell postcards for £1.99 which, after Lob postage and international shipping, left a pretty slim margin. So we went with PayPal, as they allow you to apply for micro-payments if the average transaction for your account is under £5, in which case they take only 5% + 5p (around 11p cheaper per postcard than Stripe).
Experimenting with the Bot Framework
Now we had selected our tools we had to work out how to begin to program the bot – an unexpectedly complicated task as the way to build a conversational interface differed a lot from our experience building mobile apps and websites.
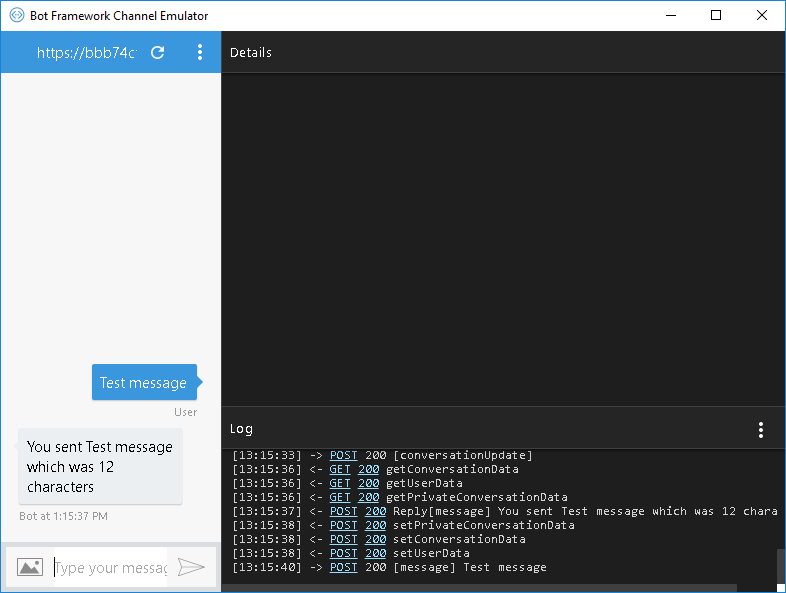
To begin with we created a simple app using a sample Microsoft had shared on GitHub, which receives some text and sends it right back to the user. Satisfyingly, we had it working locally very quickly using the Bot Framework Emulator, which acts as a dummy chat client.
We then set about saving the state of a user’s conversation with the bot. As mentioned previously, Microsoft have built a state-machine into the Bot Builder SDK so there is no need to create complicated logic (or spaghetti-code) just to keep track of where your users are in the conversation or worry about saving this information to a database. This is all done for you through dialogs.
Dialogs are the building blocks of Bot Framework conversations and each dialog implements the IDialog interface and keeps track of its own state. Dialogs can invoke other dialogs and chain them together so they can be reused. The Bot Builder SDK uses a DialogContext to manage a stack of these dialogs that are active at any one time. Initially, there is a root dialog and the first dialog is pushed onto the stack and presented to the user, which takes control of the conversation and user input until the dialog is closed or another dialog is invoked. Eventually control will return to the root dialog and the conversation can start again from the beginning.
Behind the scenes, the Bot Builder SDK is saving a binary serialised version of each conversation and its dialogs to a data store and when a new message comes it is retrieving this data, creating an exact copy of the original dialog (including private members) and resuming exactly where it left off last, which means your bot can scale easily across machines.
Planning the Interaction
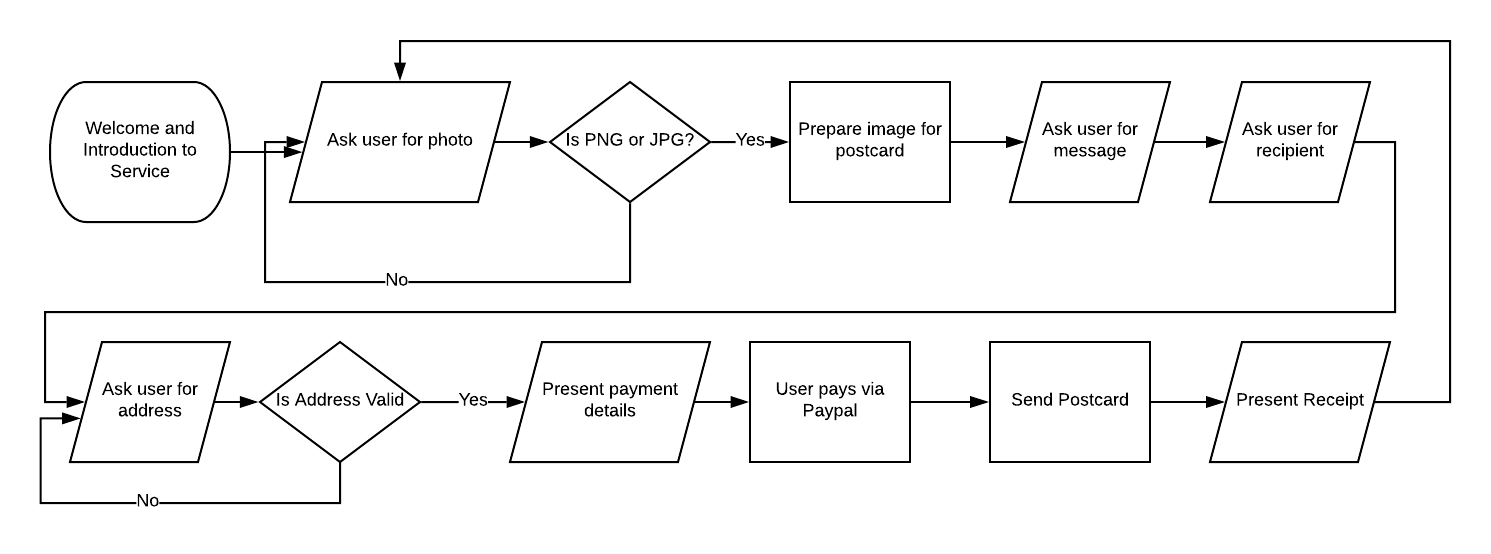
Once we knew how to use dialogs to create a conversation, we began planning what the conversation flow of our chatbot would look like. We wanted the bot to request all the data quickly and easily, so we settled on the following flow:
- Introduction, telling the user about the bot and what it does – as well as how much a postcard costs (no hidden surprises)
- Ask the user for their image, which we then process and prepare to send to Lob.
- Ask the user for the message they want to add on the back of the card
- Ask the user for the name of the person they want to send it to
- Ask the user to provide the address of the person they want to send to
- Provide a link to pay for the card via PayPal
- Provide the user with a receipt on successful completion of the payment
At each step we wanted to ensure the user would only be able to proceed if they had submitted the correct information in the right format, which is something the dialogs and the stack are perfect for. Our designed conversation flow looked something like this:
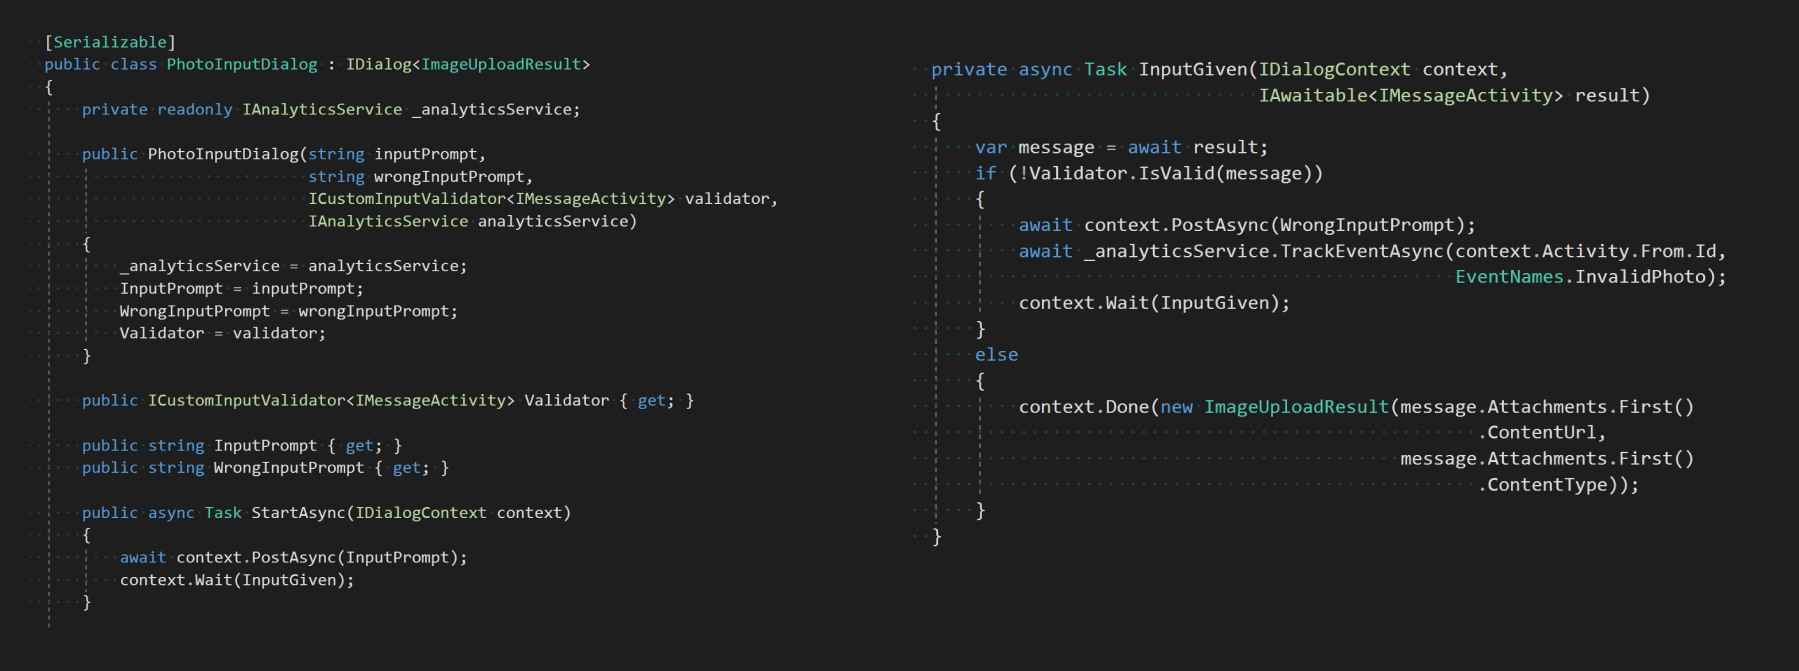
To implement most of this we created our own dialogs containing the logic for each section of the process; in some cases the dialogs were reusable, such as the TextInputDialog we created that could be configured to ask the user again if the text they entered was too long or invalid (for recipient name or message) or the PhotoInputDialog (below) that checked the image type, processed the image and returned the processed information to the dialog before proceeding.
One of the hardest interactions to create was the ability for the user to input an address. In our research we found a few other chatbots that asked the user for their address line by line to get the structured data (Line 1, Line 2, City, State etc) that they needed to send the postcard but which we were keen not to emulate. Due to the global variation in addresses, trying to parse addresses ourselves from one user input wasn’t feasible either. Instead, we decided to have the user input the whole address as one string and sent this to the Google Search and Maps API to trace and, if the address existed, return to us the standardised address and country information that we could use to send the postcard to Lob. As a result, you often don’t even need to type in the full address to return the correct information.
Displaying UI Elements in Chat
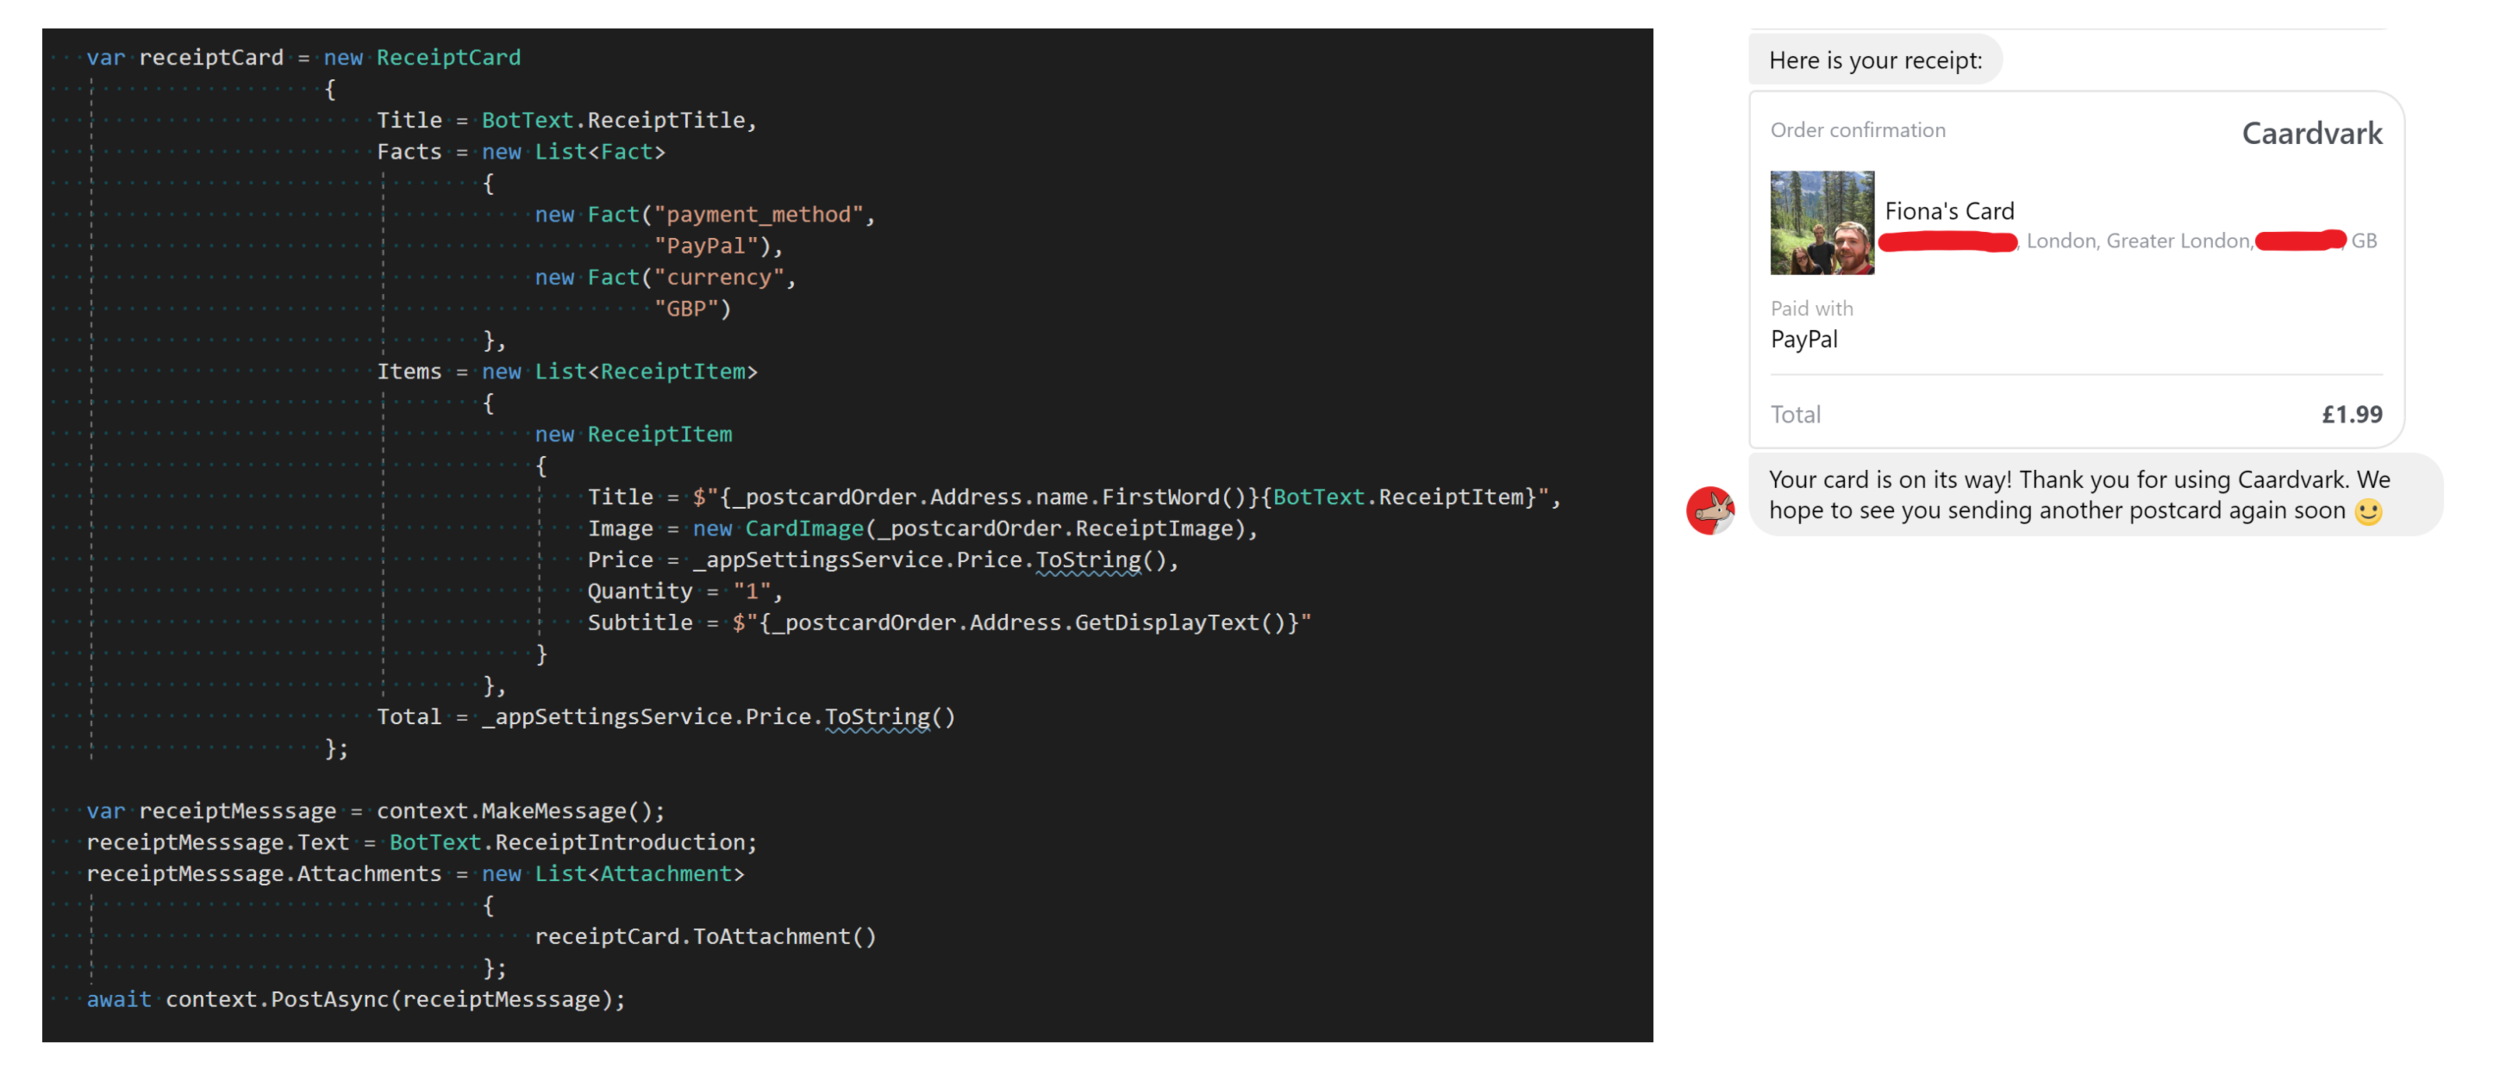
When building a conversational UI you really have very limited control over what you can show the user. For Messenger these are in the form of Message templates like media, lists and receipts. One of the great things about the Bot Framework is that it abstracts these platform-specific UI components and allows you to show them to users by creating Rich Cards which in turn create the component for the platform you are using whether it be Skype, WeChat or Messenger.
As an example, for the final stage of our bot, after the user has paid, we show the user a receipt, from a template on Facebook Messenger. Here’s the code we use to create it using the Bot Builder SDK and what the user sees in the chat client:
Branding
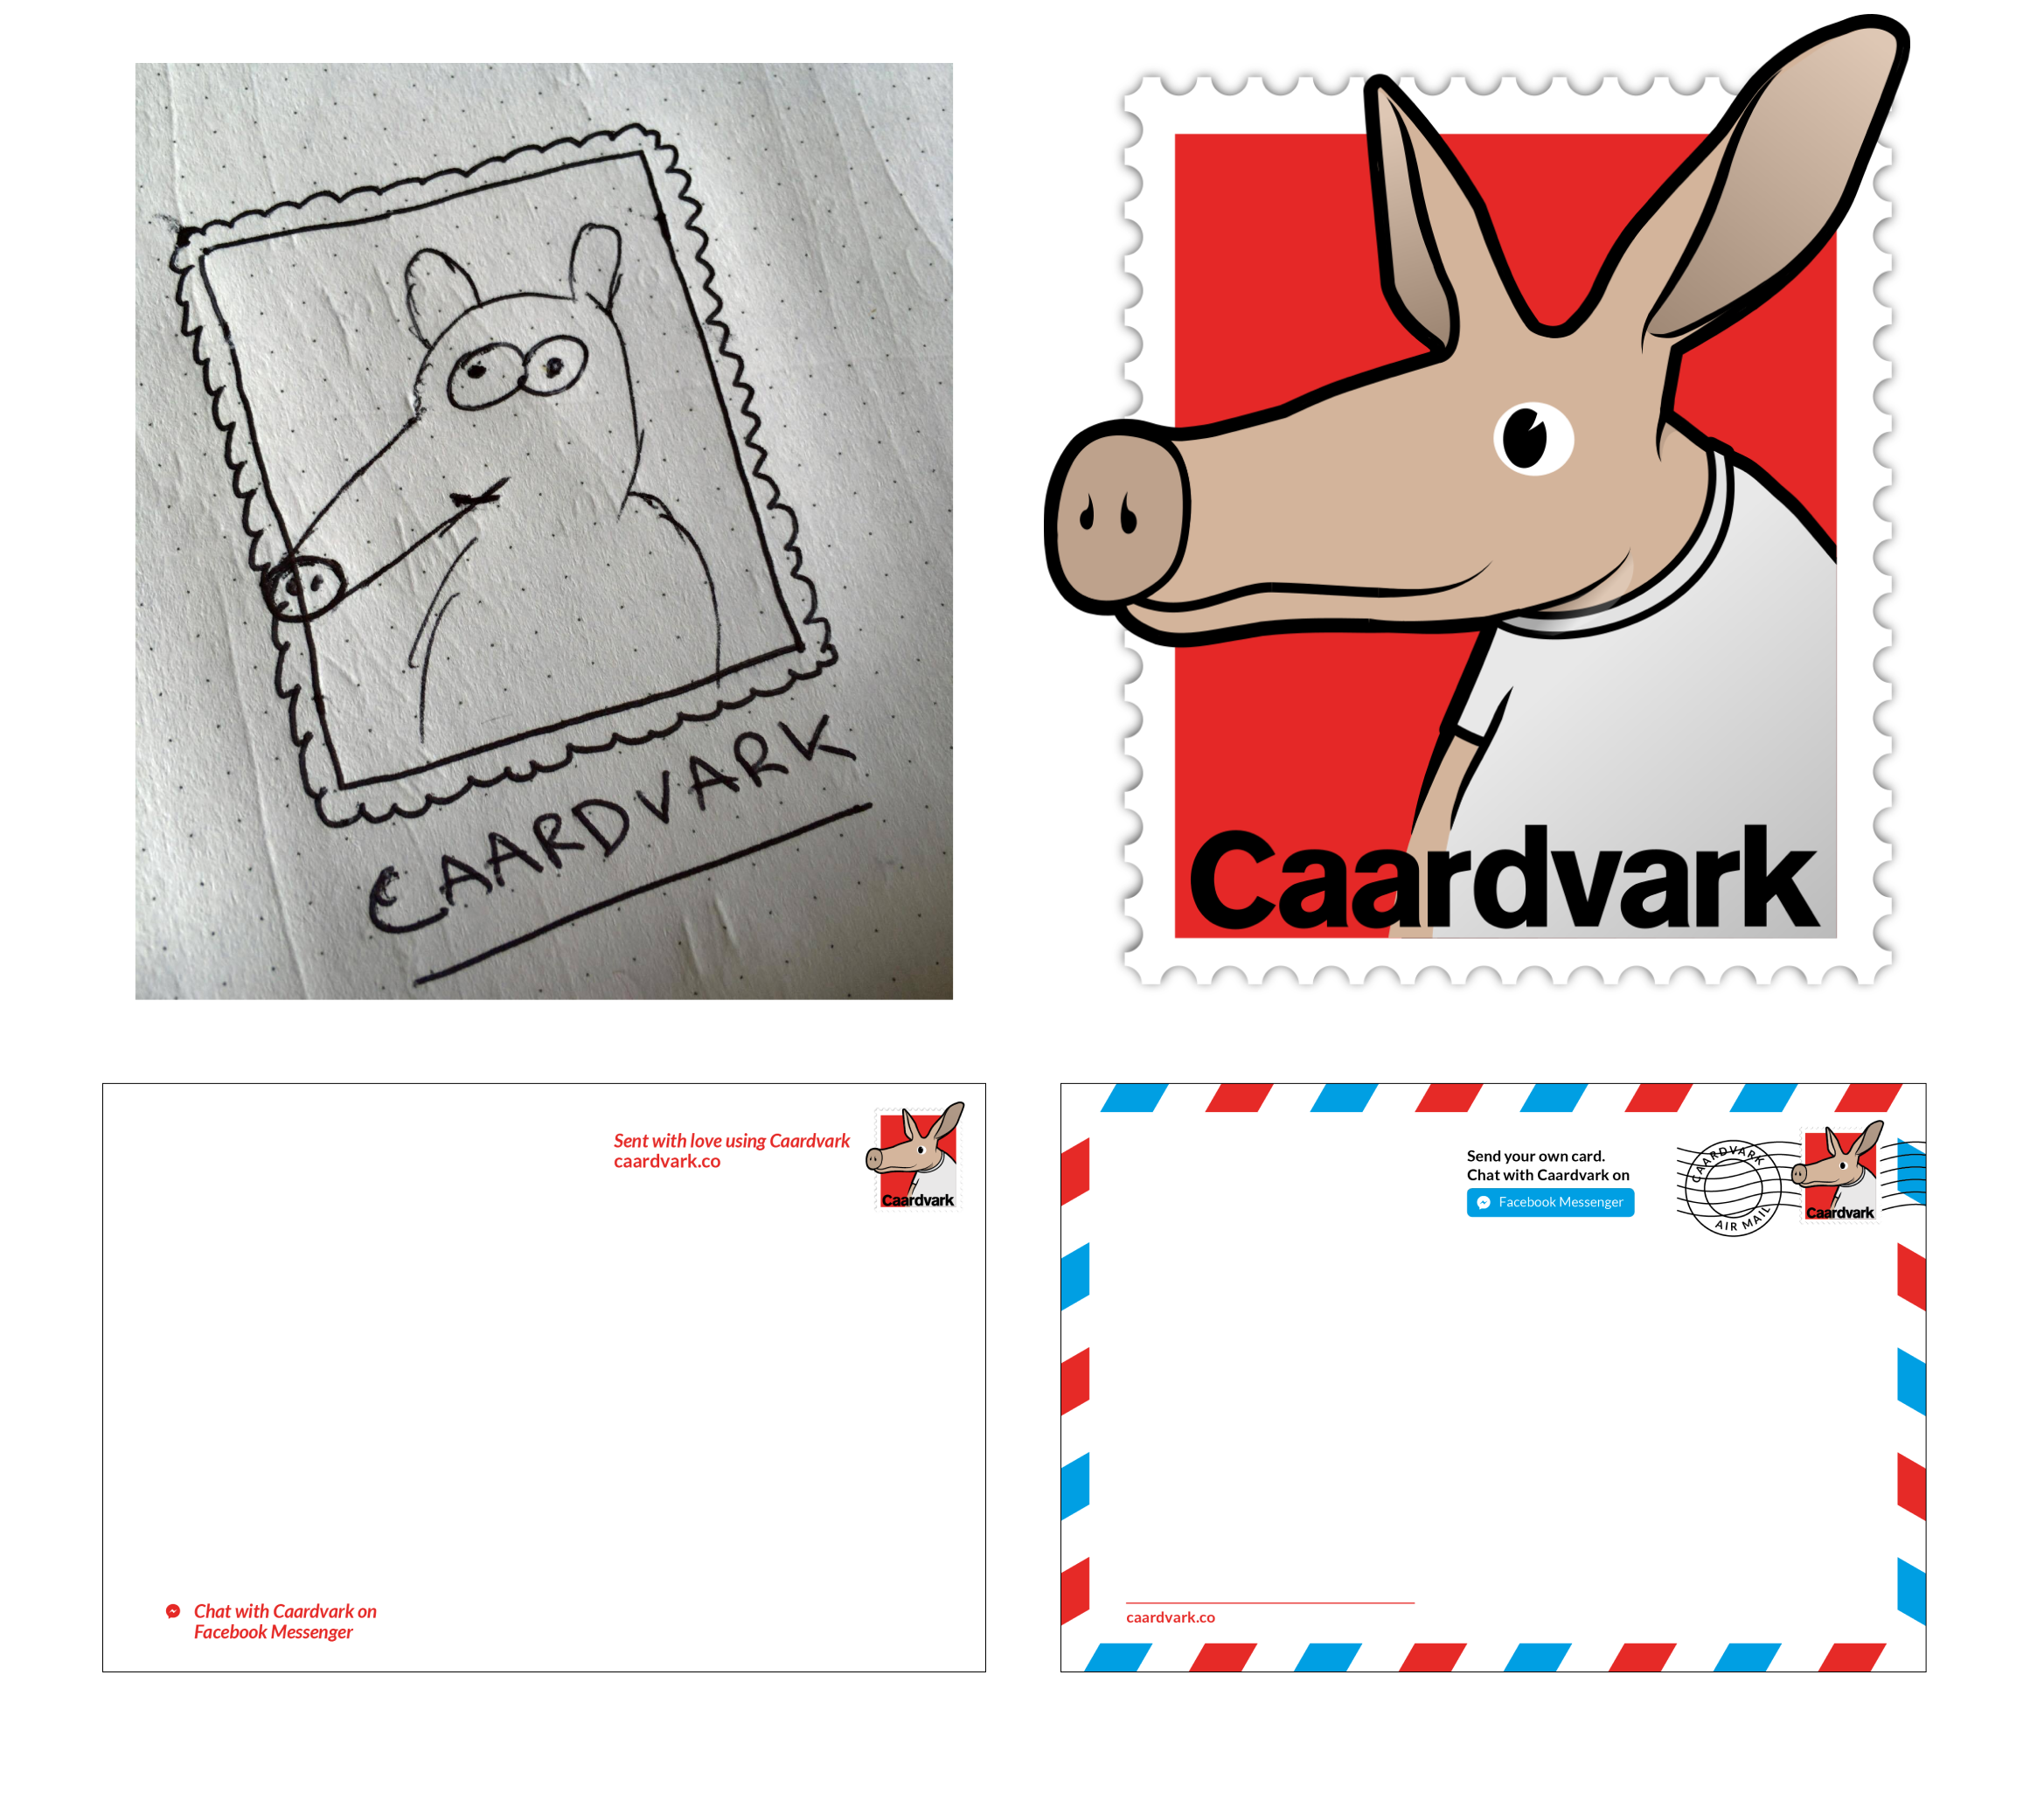
Although this was a side project I’m a sucker for a nice logo and some good branding, so we spent some time away from coding coming up with a name for our bot and a logo. We eventually settled on Caardvark (card + aardvark), which I have since discovered was one of the names Trello were initially going to use for their product!
For the logo, I mocked up a little design/ terrible sketch and sent it off to a designer friend, Kellen Brown, who worked his magic and came up with our cute mascot.
We put together the design of the back of the card ourselves initially, but Alicia Mundy, my sister, also a graphic designer, put together an airmail-themed template for the back of our card as well, giving a Caardvark card a professional look.
The "Finished" Product
Attempting to put all this together in a weekend was a tough challenge, but we had brought everything together by Sunday evening except implementing payment. There were lots of bugs and we weren’t ready to launch to a wider audience without payment, but we sent our first Caardvark card, which arrived a week later – a great feeling.
Since that weekend I’ve improved the user experience and created a website to act as a homepage for the bot that also allows users to manually add addresses Google doesn’t recognise. I’ve also learned a lot about how the Bot Framework works and sped up the service, on the left there's a video showing a walk-through of the process you use to send a card today.
Update (March 2020): As with any app, marketing is incredibly important. At the time of first writing this post the bot had sent over 100 cards, mostly but not exclusively by friends, Harald or myself. Despite experimenting
with some paid-for marketing ideas, with a low margin and a high CPC (cost per click) I really struggled to attract new users with the time and resources I had. For this reason I sold the product through 1k Projects (now Indiemaker) to a new owner based in Chicago, James Bansberg, who was excited to take it on and give it a shot.
“I saw a lot of potential in the idea itself. Simplicity is important in this day and age and the less clunky a process, the more likely it will be used. The fact that customers can use [Caardvark] without needing to download additional apps or register was very intriguing to me. Lastly I believed in Caardvark’s mission to connect individuals in a more visceral way in the age of social media.”
— James Bansberg, Caardvark's buyer